
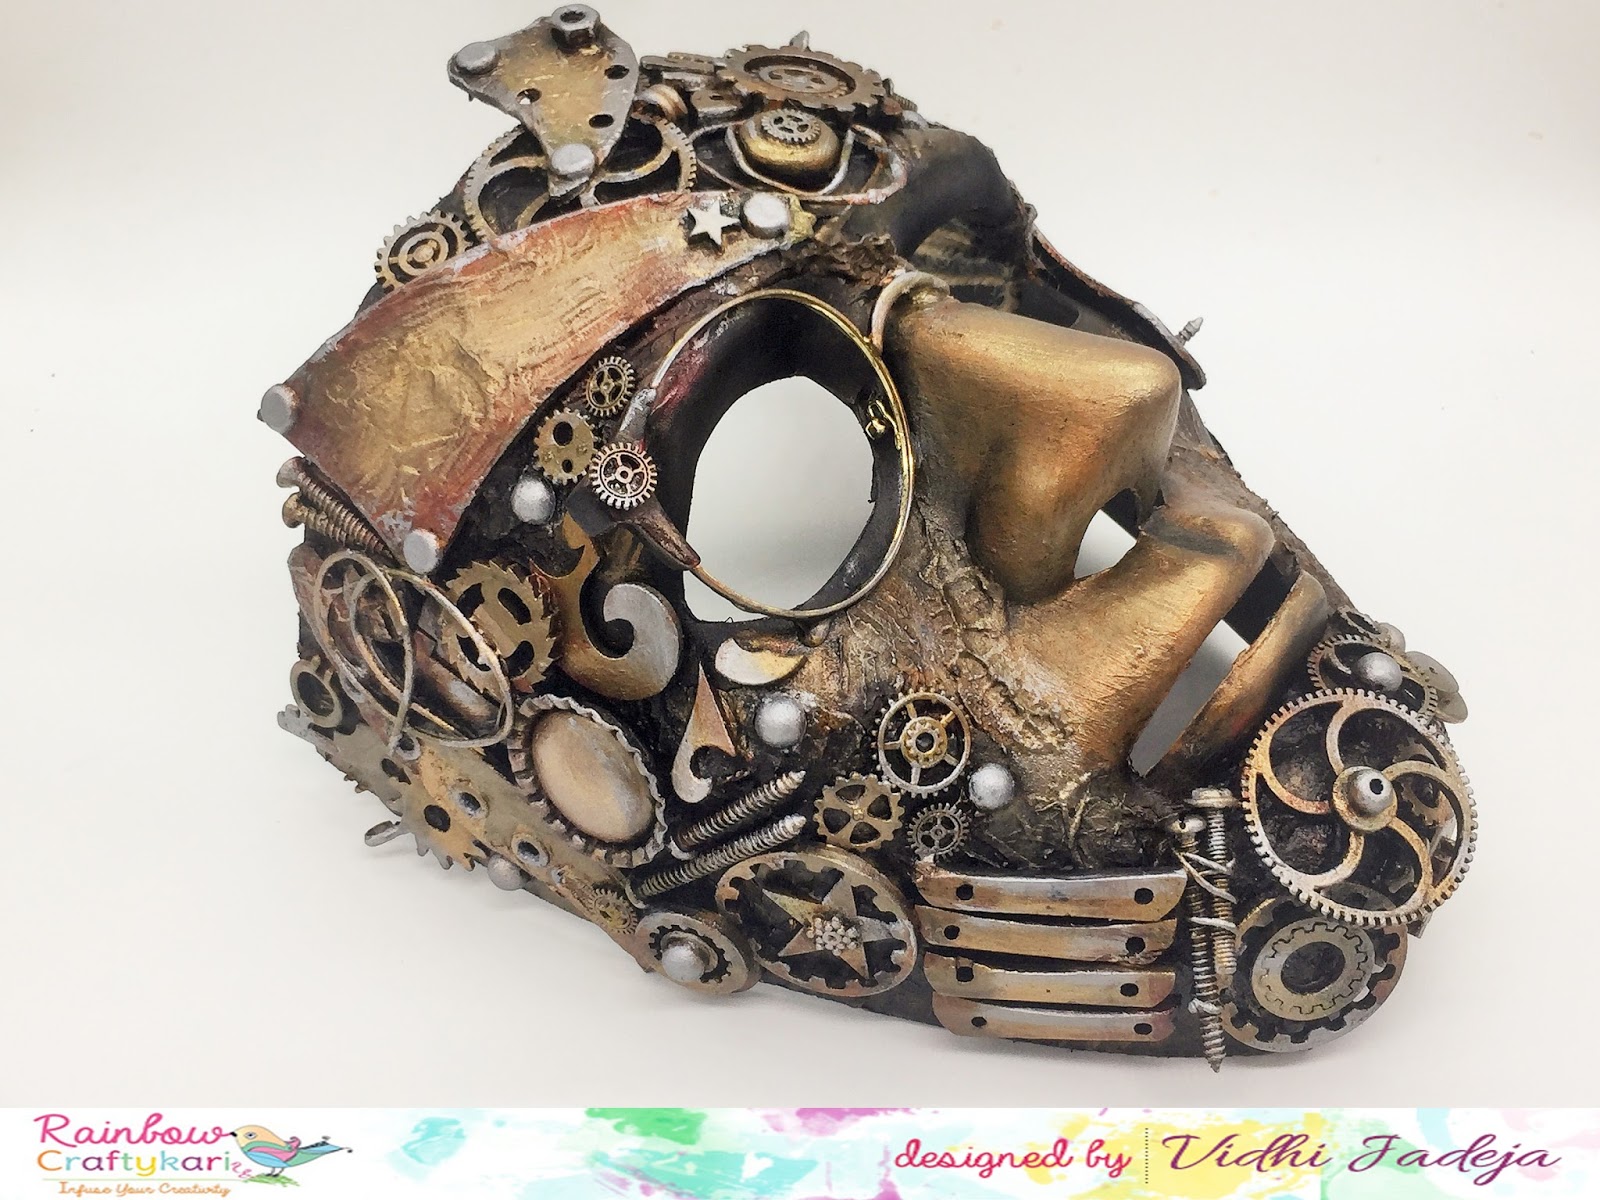
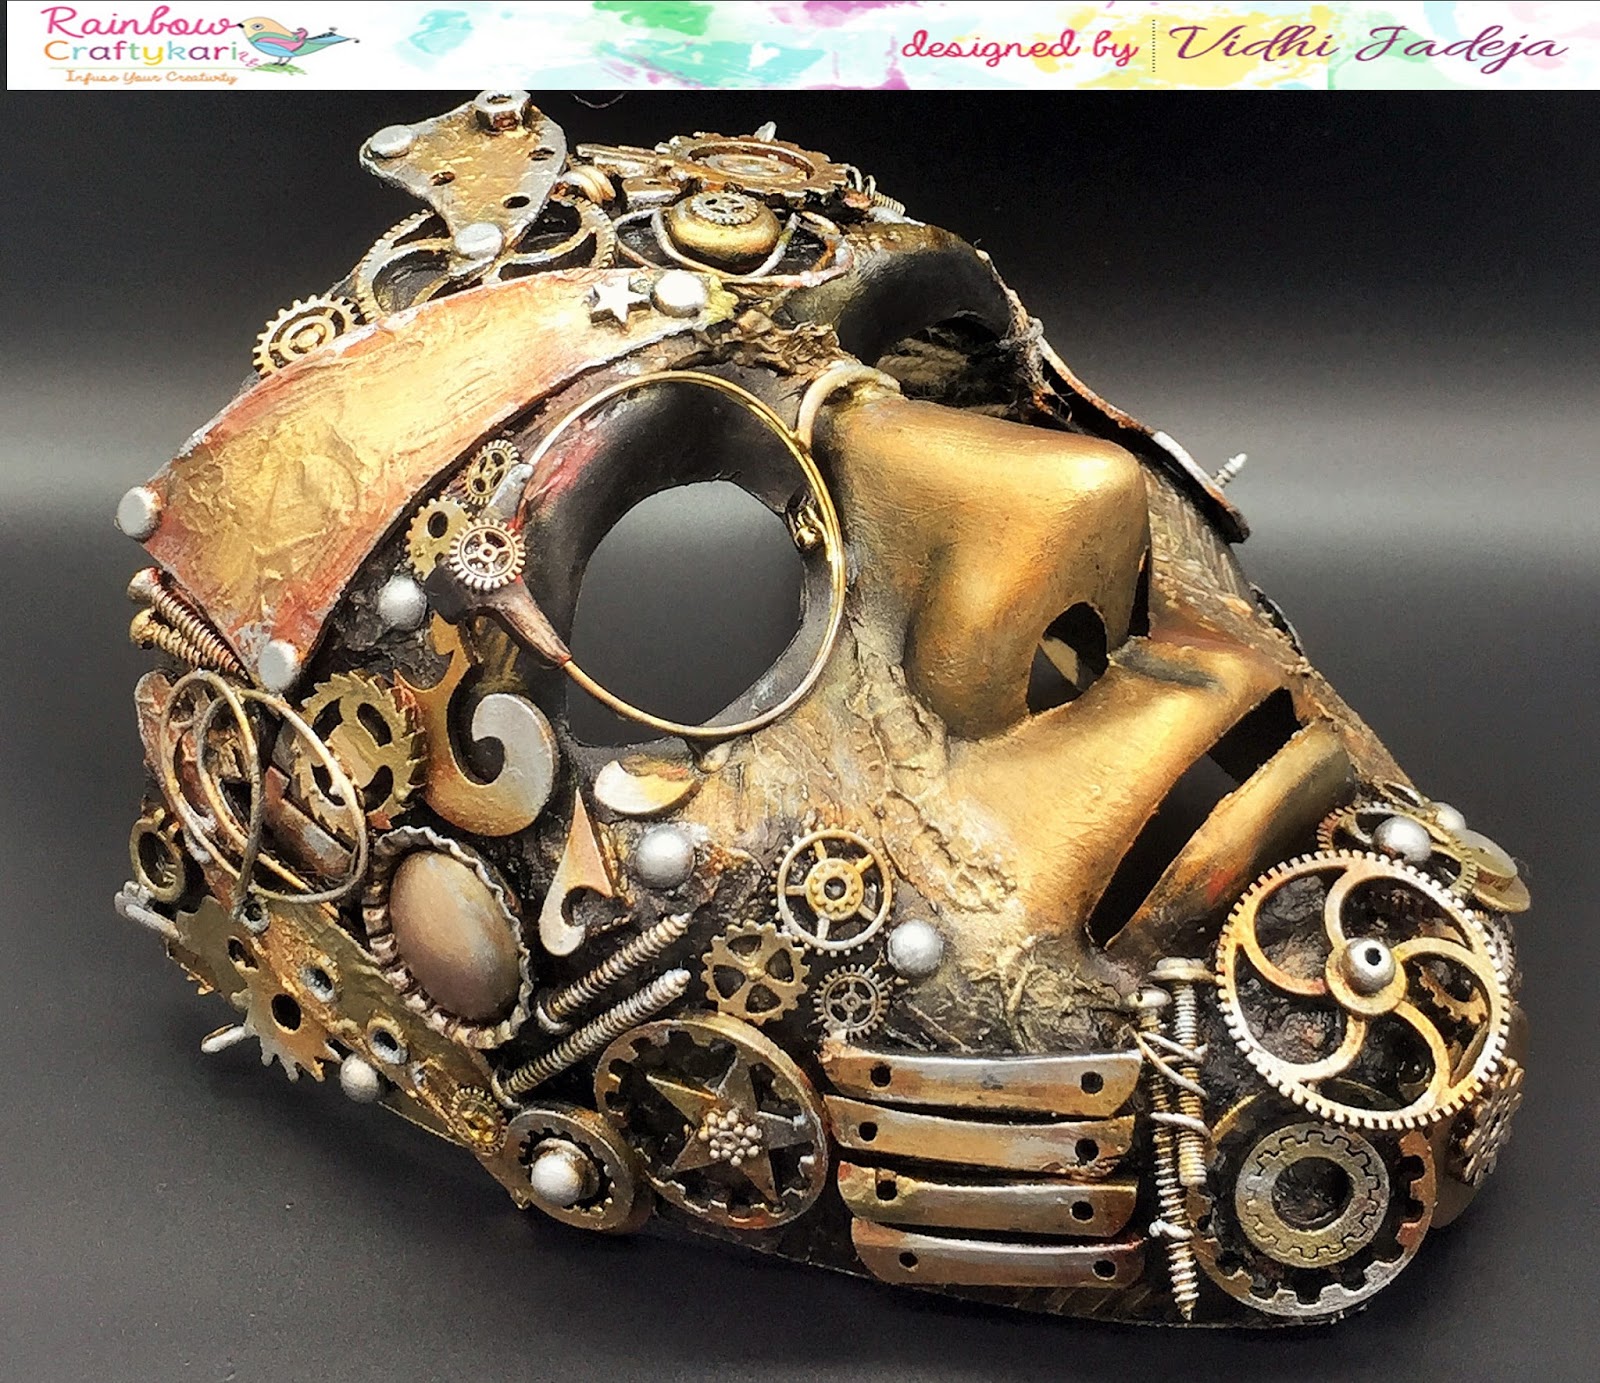
Rusty Ironed Mask
Hello Crafty Friends,
How are you all, enjoying the spring or have you already started sweltering under the Sun?
Let me fetch you some breeze with my first ‘Picture Tutorial’ at Rainbow Craftykari Blog as a DT member.
Last Sunday I went with my kids to a nearby garden. As we were walking out of the garden after play time, we spotted a street side vendor selling some toys. Kids had their gala time choosing the toy for themselves. There lay a mask and it captivated me.
The crafter in me awakened and urged me to grab it. I had a thought of giving it a look over… Metal finish with Mix Media Art! Even before reaching home, mind was searching my treasure trove for trivia and embellishments.
So here i altered an ordinary plastic mask !!!
So here i altered an ordinary plastic mask !!!


So here is how I made a Rusty Ironed Mask...
Step1:
I gave a coat of Black Gesso to the mask though it was already Black. I still applied it as a primer so that it holds the colours perfectly as its plastic material.

Step2:
Time to apply Modelling Paste through Stencils to give textures on the mask. At some places I applied Grainy Sand Paste and Fibre Paste to add more depth. Around the nose area, I gave an effect of little scar with the knife. Once all the textures dried up, I gave a coat of Black Gesso on it.


Step3:
I had some leftover chipboards pieces. Putting them to use, I drew some different uneven shapes on it and cut it down with scissor. At some places, I punched the holes with the help of eyelet punch. And at some places I added the eyelet rings and after that gave a coat of White Crackle Paste on all chipboards.


Step4:
I used different things from my treasure on the mask as a base, e.g. thread, buttons, wires, screws, broken jewellery pieces, stones, buttons, mdf steampunk gears, bottle caps, pebble stones, broken watch pieces, and broken half of spectacles! I used chipboard shapes as a last step.


If you have noticed, I made conscious efforts to select all the things that could impart masculinity to the project.
I glued all the stuffs one by one on the base with tacky glue. Layers of the stuff were made to give more depth. To stick chipboards pieces, I sprinkled some water+glycerin solution on it to impart some roundness to it. Chipboards are little challenging to fold… so had to add the softness to chipboards by sprinkling water+glycerin mixture.

Step5:
Here are some close ups of the arrangements for your perusal. After the glue dried, a very thin layer of Black Gesso on the stuff followed. However I avoided metal gears from this layering.

Step6:
Once fully dried, colouring was undertaken. I gave a coat of Rustic Brown Acrylic Metallic Paint on the layers.

Here is a tip for you…Take little bit of colour and try to do dry brushing.
Second layer was a coat of Red Wine Metallic Paint and it was followed by Gold Amber for highlighting.
And for depth on my textures i applied Lindy's Magical shakers Bratwurst Brown and Black forest Black in gaps between my all embellishments.
And for depth on my textures i applied Lindy's Magical shakers Bratwurst Brown and Black forest Black in gaps between my all embellishments.


Step7:
Final and most important thing was to give Metal look. I rubbed waxes Aged Brass and Brushed Iron at random to give metal shine on the layered stuff.

Bingo…. Rusty Ironed Mask is ready !!!


- Plastic Mask
- Black Gesso
- Modelling Paste
- Grainy Sand Texture Paste and Fiber Texture Paste
- Chipboards
- White Crackle Paste
- Finnabair Metalic Acrylic Paints
- Finnabair Waxes
- Tacky Glue
- Lindy's Magical Shakers : Bratwurst Brown and Black forest Black
- Lindy Stamp Gang (April Challenge)

- Rhedds Creative Spirit April Challenge
Happy Crafting,


This is incredible! Thank you for playing with us at Lindy's Gang!
ReplyDeleteThis is awesome!!! I love it!!! Great work!!! Thank you for joining the April challenge of the Country View Challenges!
ReplyDeleteGorgeous mask. You are really good with crafting products ... loved how you created this. Especially how you created the chipboard cutouts.
ReplyDeleteMy #AtoZ theme post: https://lonelycanopyblog.wordpress.com/2018/03/23/every-house-has-a-soul/
Do let me know what you think about it.
Your mask is absolutely stunning..the detail is amazing, I just love it.
ReplyDeleteGreat step by step instructions too.
You can enter our challenge as many times as you wish but they must be separate blogs posts..
Thank you so much for joining our challenge this month at Rhedd's Creative Spirit...
Whoa! Imaginative, creative and beautiful... I love how you created your bits and pieces with chipboard and the finished item is truly impressive. Thanks for showing us at Country View Challenge!
ReplyDeleteWhat a really interesting mask. The way you combined elements is terrific.Thank you forjoining with us at Rhedd's Creative Spirit Challenge this month.
ReplyDeleteFabulous! absolutely fabulous! I love this! Thank you for entering your project at Rhedd’s Creative Spirit. Sammy-x
ReplyDeleteI was reading some of your content on this website and I conceive this internet site is really informative ! Keep on putting up. medical mask supplier china
ReplyDelete